

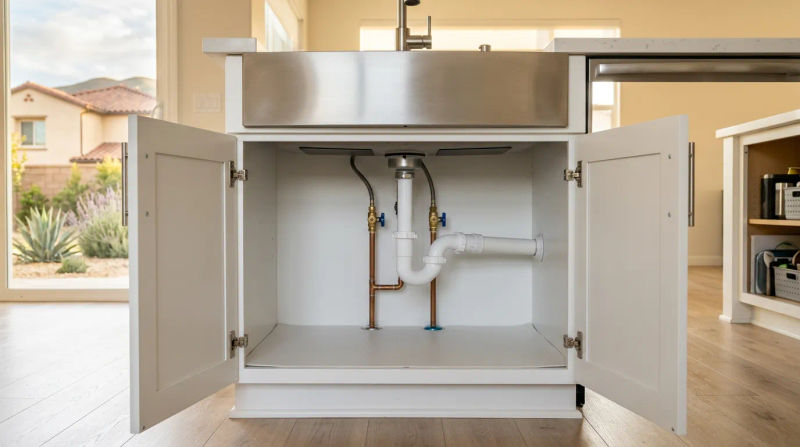
It’s a smell that’s all too familiar for many homeowners: that faint, musty odor that seems to come from nowhere. For one of our clients in Chino Hills, that smell was the first sign of trouble. It started in October, just as the cooler, damper days began to set in. At first, they dismissed it, but then they noticed the floor of the cabinet under their kitchen sink felt slightly damp to the touch. The bottom edge of the particle board was just beginning to swell. They knew they had a leak, but they couldn't see a single drop of water. Frustrated and worried about potential water damage, they gave us a call at Gps.
My name is Marco Alvarado, and as a lead technician for Gps, I’ve seen this exact scenario play out many times. In Chino Hills, where many homes were built in the 1990s and 2000s, the original plumbing fixtures are starting to reach the end of their expected lifespan. An intermittent drip can go unnoticed for weeks or even months, slowly causing damage until the signs become too obvious to ignore. This was a classic case, and I knew our team needed to act quickly to prevent a small nuisance from becoming a major cabinet replacement project.
The Assessment
When I arrived at the home, a beautiful two-story house typical of the neighborhood, the homeowner showed me the cabinet. The musty smell was present, and I could see the slight warping they had described. The first step in any under-sink leak repair is a thorough investigation. You can't just fix what you see; you have to find the true source of the problem.
I started by completely emptying the cabinet - cleaning supplies, trash can, and all. This gave me a clear, unobstructed view of the plumbing. I wiped down every pipe, valve, and connection with a dry cloth. Then, I asked the homeowner to run the water, first cold, then hot. We watched the P-trap, the drain lines, and the faucet connections. Nothing. We ran the dishwasher. Still nothing. This is the frustrating reality of trying to stop intermittent drip under kitchen sink; it doesn't perform on command.
This is where the diagnostic expertise of the Gps team comes in. We know that leaks from supply lines are often the culprit. These leaks can be incredibly small, sometimes only releasing a single drop of water every few minutes when the pressure in the line fluctuates. To find it, I laid down dry paper towels across the entire base of the cabinet. Then, I systematically pressurized the system. I turned the faucet on and off quickly several times to create small water hammer effects and put the fittings under stress.
After about ten minutes, a tiny, dark spot appeared on the paper towel directly under the cold water supply line connection. We had found our culprit. It was a very slow, almost invisible Chino Hills kitchen sink leak from supply line. The compression fitting on the original builder-grade supply line had started to fail after two decades of service. It was a tiny failure, but over time, it was releasing enough water to saturate the cabinet floor and create the perfect environment for musty odors and wood rot.
Our Solution
Once we identified the source, creating a plan was straightforward. This wasn't a job that required tearing out walls or replacing the entire sink; it required a precise, professional repair to ensure a long-lasting fix. At Gps, we don't believe in temporary patches. We believe in doing the job right the first time.
The solution involved replacing both the hot and cold water supply lines. Even though only the cold line was leaking, the hot water line was the same age and made of the same material. Replacing it at the same time is preventative maintenance that saves the homeowner from a second service call in the near future.
Here was our step-by-step process for this handyman plumbing leak repair Chino Hills:
- Water Shut-Off: First, I closed the hot and cold angle stops - the small valves under the sink - to shut off the water supply to the faucet. I then opened the faucet to release any remaining pressure in the lines.
- Removal of Old Lines: Using a basin wrench, I carefully disconnected the old, stiff supply lines from both the angle stops and the faucet shanks. Years of sitting in place can make these connections stubborn, but with the right tools and technique, they came off without damaging the faucet or the valves.
- Component Inspection: With the old lines removed, I thoroughly cleaned and inspected the threads on the angle stops and the faucet. I was looking for any signs of cross-threading, corrosion, or mineral buildup that could prevent a perfect seal. Everything looked to be in good shape.
- Material Selection: We replaced the old lines with modern, high-quality braided stainless steel supply lines. These are far superior to the older plastic or rigid copper lines. They are more flexible, easier to install without kinking, and incredibly durable, offering excellent protection against bursting and leaks.
- Professional Installation: I carefully threaded the new lines onto the faucet and angle stops, hand-tightening them first to prevent cross-threading. Then, I used a wrench to give them a final quarter-turn to create a snug, watertight seal. It's crucial not to over-tighten, as that can damage the rubber gaskets inside the fittings.
This entire repair was completed in under an hour during a single visit. We pride ourselves on being efficient and respecting our clients' time.
The Results
The result was immediate and decisive: the leak was gone. But for the Gps team, the job isn't over until we've proven it. I turned the water supply back on at the angle stops and thoroughly tested our work. I ran the hot and cold water for several minutes, checking our new connections for any sign of moisture. They were bone dry.
For the final confirmation, I repeated the paper towel test. I placed a fresh, dry sheet under the new connections and we let it sit for about 20 minutes while I cleaned up the work area and put everything back in the cabinet. When I pulled the paper towel out, it was perfectly dry. The homeowner was relieved and thrilled.
Beyond fixing the leak, we provided significant value. By addressing the problem quickly, we saved the homeowner from a much larger expense. Left unchecked, the leak would have eventually destroyed the kitchen cabinet, potentially damaged the subfloor, and created a risk for mold growth. The cost of this simple under-sink leak repair was a tiny fraction of what a cabinet replacement and mold remediation would have been.
The homeowner now has peace of mind knowing their sink is secure, the musty smell will dissipate, and their kitchen is protected. They were especially pleased with our professionalism and how we explained every step of the process. That’s the Gps difference - we’re not just fixing problems; we’re building trust with our neighbors here in the community.
If you're noticing a strange smell, dampness, or visible water damage under your sink, don't wait for it to get worse. A small drip can cause big problems over time. Let our team find and fix it for you.
Ready for your own Gps experience? Contact us today for a free inspection.